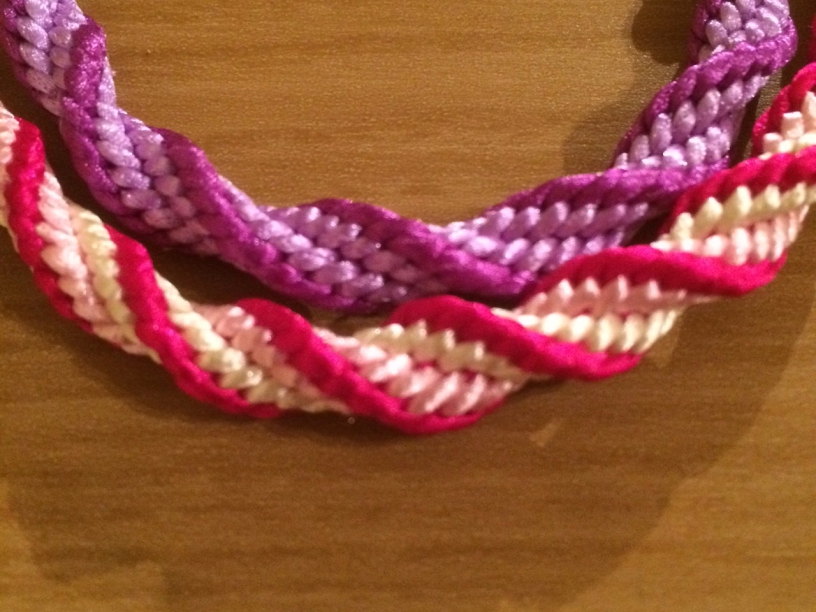
Hi everyone, this will be the final kumihimo tutorial for a while but it is a good one: spiral kumihimo. It is a bit more complicated than the first two braids I showed you but is definitely worth the effort!
You can find the tutorial for the basic braid here and the beaded braid here. Check them out if you want to learn how to make your braid into a keyring or bracelet!
Spiral Kumihimo Set Up
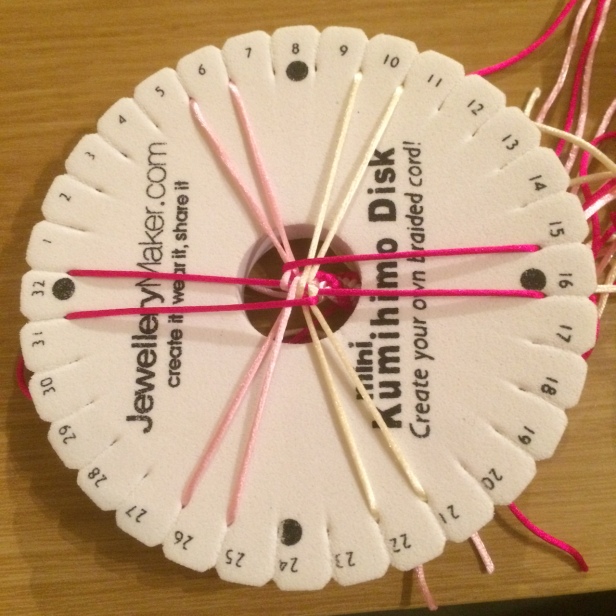
The basic braid tutorial gives the basics on the stuff you will need and how to set up for a kumihimo braid. In this case we are using twelve strands. Four of those will need to be longer as they will form the outside of the spiral (the dark pink strands in the photos). I made mine about half as long again which was plenty but it is good to be on the safe side!
The starting points for the braid are shown in the picture below. It is important to make sure the two inner colours (the white and light pink cords in the photo) are relatively close together else you won’t get the spiral effect (I very much learnt this the hard way!).
The Spiral Braid
Once you are set up this is how you make the braid. Note how my inner cords are further apart – make sure you start like the above not below!!!


Ignore the outer cords (dark pink) and left side inner cords (white) for now and moving the right side cords (light pink)
- Take the top right cord from the right side of the disk and bring it down to the bottom right of the disk keeping it on the right side of the bottom cords
- Take the bottom left cord from the right side of the disk and bring it up to the top right of the disk keeping it on the left side of the top cords
(This is similar to the basic braid but instead we are working at a sort of angle on one side of the disk). Next…


Ignore the outer cords (dark pink) and right side inner cords (light pink) now and moving the left side cords (white)
- Take the top right cord from the left side of the disk and bring it down to the bottom left of the disk keeping it on the right side of the bottom cords
- Take the bottom left cord from the left side of the disk and bring it up to the top left of the disk keeping it on the left side of the top cords
Last stage…


- Turn the disc so that the outer (dark pink) cords are at the top and bottom of the disk
- Bring the top right cord down to the right of the two bottom cords
- Bring the bottom left cord up to the left of the two top cords
This is the spiral braid! To carry on turn the disk again so that the now the white cords are on the right side and the light pink are on the left side and repeat! Remember to always turn the disk the same way each time. Carry on to the length you want and make whatever you want!
If you have any problems or questions let me know and I will try and help. You can also send me photos of anything you make and I will feature them in a post with a link to your blog! You should definitely give this technique a go! You can also check out my etsy shop for inspiration and to buy completed pieces of jewellery!


Hi Sarah,
I’ve been meaning to write to you in a while. All of your posts are so interesting, and all your DIYs are so lucid and elaborate, and I loved reading them. Your macrame and kumihimo creations are exquisite. I wish you all the very best! Shall keep reading your posts, and shall try my hand at macrame and kumihimo with your posts as my tutorial. Thanks Sarah! Have passed on your interesting libks to my circle.
Warm regards. Vaishnavi
LikeLiked by 2 people
Thank you for the lovely comment! I am really glad you like them. If you decide to make any DIYs send me a photo and I will include it in a post with a link to your blog.
LikeLike
Definitely will do!
LikeLiked by 1 person
Awesome!! Thanks for these tutorials – I can’t wait to explore all of the different styles for making these braids and then finding creative ways to work them into my crochet projects!! 😀
LikeLiked by 1 person
You have a very nice blog. Best wishes 👌👍🌹💐☺
LikeLike